|
#51
IP: 76.24.202.79
 05-11-2010, 09:13 PM
|
||||
|
||||
|
Now that the platoon is awake and we have thrashed this around a little, here is one more suggestion before we bring in the heavy stuff. Try tapping lightly with a small ball peen over a sharpened putty knife - Tom is right about rust being a lousy glue.

|
|
#52
IP: 24.128.37.219
05-12-2010, 05:49 AM
|
||||
|
||||
|
Shawn,
I was once in a "boat launches on Friday" type scenario and ended up on the hard later in the summer doing something I should have done before going back into the water (actually, it was shaft replacement, among other things). So I would suggest a "do the job right" approach -- you really do want your engine aligned, and also, alignable (is that a word) in the future. -jonathan
|
|
#53
IP: 206.125.176.3
05-12-2010, 08:27 AM
|
||||
|
||||
|
Thanks for the continued support and suggestions.
Thunderstorms are the forecast today, so that likely means a chance to free the couplers from their lousy, rusty glue and re-align them when I take off work early to head over to the boat. What I hope I find once the parts are apart is enough mis-alignment as to be obvious. So, provided one of the above methods works without damaging anything, do I clean up the two mating pieces before re-assembly? And if so, what is the best method? Should I apply a film of wax or something to the mating surfaces to make de-coupling easier in the future, for when the day comes I need to replace stuffing boxes & cutless bearings?
__________________
-Shawn "Holiday" - '89 Alura 35 #109 "Twice Around" - '77 C-30, #511 with original A-4 & MMI manifold - SOLD! (no longer a two boat owner!!) 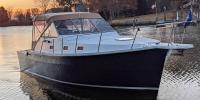
|
|
#54
IP: 216.120.197.130
05-12-2010, 08:44 AM
|
||||
|
||||
|
I should have stated outright that I think Thatch is right about using the cold chisel. It is the first thing I would have tried. Sorry you felt alone in the wilderness Tom!
The pipe wrench thing does work, however. I had recourse to a pipe wrench when replacing my rear seal just last month. I will defer to the expert. Here is an excerpt from the instructions Don Moyer provides for removing the coupling: Quote:
Last edited by marthur; 05-12-2010 at 12:08 PM. Reason: spelling
|
|
#55
IP: 76.7.102.57
05-12-2010, 09:48 AM
|
||||
|
||||
|
Having read this thread I plan to do a little checking on the MC. I will unbolt and separate the flanges and check alignment. All this .003 has me worried; I did not do it that exactly when I reinstalled the A-4. Then coat both parts with anti-seize and or make an over sized gasket to keep the plates from rusting together. Thanks for a new reason to get back onboard. Dan S/V Marian Claire
|
|
#56
IP: 64.203.32.52
05-12-2010, 09:56 AM
|
|||
|
|||
|
Shawn, what diameter is your shaft. Mine is 3/4" stainless and my mounts are so rusted that I have&will not attempt to adjust as I am just waiting for my steel
 mounts to fail which is a common problem in these ole' Ericsons. When I installed my Indigo I also installed a new stuffing box and straightened my shaft. When I separated the shaft from the coupler I could see that I was misalligned quite a bit about 3/8"(low) of an inch and I thought that that was due to the bent shaft. After straightening and installing the new s-box I found the alignment was still a 1/4" off, so I pulled up an the shaft and shoved it in the coupler. I had been running the boat for years this way and still do. As I said my adjusting nuts are so corroded I don't want to twist them off the frame rails there that bad. I am sort of waiting for the engine to fall over then I will re-bed and adjust. I don't worry about the allignment all that much as the 3/4" sahft is quite flexible and is about 34" long. I know this is not the best but I have had no problems in the last 5 years or the previous 20. This may be why my rear seal is beginning to fail and leak a bit. mounts to fail which is a common problem in these ole' Ericsons. When I installed my Indigo I also installed a new stuffing box and straightened my shaft. When I separated the shaft from the coupler I could see that I was misalligned quite a bit about 3/8"(low) of an inch and I thought that that was due to the bent shaft. After straightening and installing the new s-box I found the alignment was still a 1/4" off, so I pulled up an the shaft and shoved it in the coupler. I had been running the boat for years this way and still do. As I said my adjusting nuts are so corroded I don't want to twist them off the frame rails there that bad. I am sort of waiting for the engine to fall over then I will re-bed and adjust. I don't worry about the allignment all that much as the 3/4" sahft is quite flexible and is about 34" long. I know this is not the best but I have had no problems in the last 5 years or the previous 20. This may be why my rear seal is beginning to fail and leak a bit.NOTE I did this all in the slip and paid the diver for an hour over the 2 dives. I didn't even get enough water in the boat to kick off the bilge pump. I took about a week altogether. Dave Neptune 
|
|
#57
IP: 71.129.177.52
05-12-2010, 10:25 AM
|
|||
|
|||
|
Thank's for allowing me back into the barracks.
Shawn,
I will echo the comments of others who suggest going through with the aleignment process. Motor mounts tend to settle over time and use and I would be surprised if yours hadn't. I have found that the easiest way to prep the flange faces for measuring (if they are still in the boat) is to use a "flat bastard file" and while holding pressure on the file at the center of the flange, rotate the flange and work the file back and forth. The object is to remove the rust contamination while removing as little material as possible. It's a little late to be mentioning this but I also usually put center punch dots on the 2 flanges so that I can reassemble them in the same position. If you remove the propshaft flange you can flatten it's face by placing a sheet of sandpaper (about 80 grit) face up on a machined surface, like a table saw or a granit counter top and working it back and forth. Hang in there, we'll stick with you until she's back in the water. Tom
|
|
#58
IP: 71.129.177.52
05-12-2010, 10:39 AM
|
|||
|
|||
|
Confession is good for the......
All,
During all of this discussion on Shawns project I have been mentally preparing myself for re-aleining my own A4. Based on the rusty condition of the right rear motor mount (caused by a leaking water pump) I'm sure it hasn't been done in many years. As soon as I finish my "tiller to wheel changeover" I will be tackling the dreaded "A" project myself. I'll keep you informed on how it goes. Tom
|
|
#59
IP: 173.133.86.130
05-12-2010, 11:10 AM
|
||||
|
||||
|
Take the time to take pictures.
Then if you can, take the time to do a thread. That way, the rest of us can learn from your pain... er, ah, experience. (  ) )
__________________
-Jerry 'Lone Ranger'  1978 RANGER 30 Last edited by roadnsky; 05-12-2010 at 11:18 AM.
|
|
#60
IP: 206.125.176.3
05-12-2010, 12:26 PM
|
||||
|
||||
|
pic
Jerry,
I have a pic..not the best, & not related to the coupler but this is what I have related to the subject at hand. I have another one waiting to upload from the cell phone.  Dave, I have a 1" bronze shaft. I know I am supposed to align the motor in the water too, but I am interested to see if when I pop the coupler loose if it instantly shows a mis-alignment as yours did. This is my theory because my motor mounts have moved over the years..one of the large nuts that adjusts the motor had moved down almost 1/2" away from the motor and more than one were loose..I just don't know which way to move it to fix the problem!
__________________
-Shawn "Holiday" - '89 Alura 35 #109 "Twice Around" - '77 C-30, #511 with original A-4 & MMI manifold - SOLD! (no longer a two boat owner!!)
|
|
#61
IP: 76.24.202.79
05-12-2010, 03:09 PM
|
||||
|
||||
|
Shawn - Don't wait until the boat is in the water to align. It's ok to separate the couplers on the hard, see how far out you are, and go ahead and correct to .003" (or better if you can!) - leave the shaft disconnected until you are back in the water, do a re-check, and then bolt her back together. On a fibreglass boat there might not be any change at all from "hard to water" alignment.
|
|
#62
IP: 206.125.176.3
05-12-2010, 03:17 PM
|
||||
|
||||
|
HC,
Roger, heading out shortly to go work on this. How do I get to 0.03" ? ? ? I have a feeler gauge set and its thinnest is 0.05. I assume I'll be able to slide a gauge in there without all the rust holding the parts together. ") Thanks to everyone for holding my hand thru this!
__________________
-Shawn "Holiday" - '89 Alura 35 #109 "Twice Around" - '77 C-30, #511 with original A-4 & MMI manifold - SOLD! (no longer a two boat owner!!)
|
|
#63
IP: 76.24.202.79
05-12-2010, 03:36 PM
|
||||
|
||||
|
Shawn - Once you have separated the couplers, and before you try to check alignment, look at Tom's suggestion about filing the surfaces with a bastard file. After that I like to apply a little machine oil to both surfaces making sure no foreign matter remains on either surface. Your .005" feeler gauge is not going to cut it. Spring for a new set from NAPA with sizes down to .001" and you will get an accurate measurement. Even a well wiped "dirty" feeler gauge can be off .001" or more.
|
|
#64
IP: 151.200.22.164
05-12-2010, 10:55 PM
|
||||
|
||||
|
HC - thanks for the tips..here is the update.
I still don't know what a bastard file is...need to google it. As suspected, it was WAAAAAY off. (relatively speaking, when we are talking 1000's of an inch tolerance.) Here is a pic after I got the coupler separated..A little tap with my hand on the sharpened paint scraper took care of the 'bad glue'...what a great idea. I already had one in my tool bag. You can visually see in this pic that it was separated at top & tight at the bottom. When I separated the two pieces, the shaft part immediately dropped...with my fingers around the two, I could tell the shaft was low & the engine was high. So..this pic is bolts out, 'glue' loose, and after I was able to get the coupling back in and jammed together by hand...this is basically the "what I started with state". I don't have it right yet, but I got it better...I bottomed out the port aft mount dropping the motor, so at some point I will have to start from scratch, as each mount is in some different location between bottomed out and all the way up. It seems also as I rotate the shaft that there is consistent gappage on the port side of the coupling...indicating the engine needs to move to stbd...I loosened the mount bolts & whacked on the mounts a bit, but they will need some 'massaging' to actually move. By the end of the evening, I got to .005" would fit in the top, but would not slide past 8 or 2 o'clock. I could not get .005" into the bottom of the coupling. As mentioned above, stbd side always got tighter quicker than port. The bottom line is it is better than it was, but needs more work. This thread has been very enlightening 
__________________
-Shawn "Holiday" - '89 Alura 35 #109 "Twice Around" - '77 C-30, #511 with original A-4 & MMI manifold - SOLD! (no longer a two boat owner!!)
Last edited by sastanley; 05-12-2010 at 11:15 PM. Reason: more detail, as always
|
|
#65
IP: 76.24.202.79
05-12-2010, 11:11 PM
|
||||
|
||||
|
Shawn - Great job - looks good. Now work on getting all 4 engine mount points free so you can work. From what I can see, it looks like the front of the engine will have to be raised but this is only preliminary. You might want to lose that ss wire on the coupler set screw - it seems to be attacking the coupling.
|
|
#66
IP: 151.200.22.164
05-12-2010, 11:18 PM
|
||||
|
||||
|
hanley,
it has been attacking it since 1977. The only thing the PO ever did with the prop shaft was put some white paint on the coupling to have the prop vertical when he (my father) raced it in the '70s & early '80s (I know this because my pre-race job was to set the prop prior to races when I was a kid!) What do I replace that wire with? Also, what is really weird is the port forward mount is all the way up ( I only moved the aft ones today), and the port aft mount is all the way down (bottomed out) - the stbd side mounts are both "somewhere in the middle". Other than trying to whack the aft mounts to stbd, I attempted to work on one axis and move only the aft mounts an equal amount today. Maybe a geometry person can help me? 
__________________
-Shawn "Holiday" - '89 Alura 35 #109 "Twice Around" - '77 C-30, #511 with original A-4 & MMI manifold - SOLD! (no longer a two boat owner!!)
Last edited by sastanley; 05-12-2010 at 11:27 PM. Reason: blah blah blah
|
|
#67
IP: 76.24.202.79
05-12-2010, 11:31 PM
|
||||
|
||||
|
Shawn - Actually the wire is a side issue, sorry I sidetracked on it. Regarding the shaft alignment it is important to understand that the shaft is the "boss", it dictates or in other words it must be satisfied first. Take hold of the shaft coupling and ignoring the engine move the shaft around to where you think it is straight in the cutless, or in your case strut bearing - the position you would like to be in if you were the shaft and had to transfer power from the engine to the prop. Some people actually make a temporary jig out of wood scraps and "support" the shaft and coupling in this "most desirable" spot. The engine must now be brought to the shaft coupling. It is rather like the tail wagging the dog, but this is how it has to be. First digest this conceptually, and the actual mechanics of making the alignment will be simple, albeit tedious. A bastard file is available anywhere for a few bucks; I used to know the origin of the nomenclature but I forgot.
|
|
#68
IP: 151.200.22.164
05-12-2010, 11:38 PM
|
||||
|
||||
|
SO, should I spin the shaft (separate from the motor) while the boat is on the hard and cradled by the stuffing box & cutless bearing, and observe from underneath???
What I did today was try to set the shaft half of the coupler such that there was no visual bias on the stuffing box and then push it into the engine half of the coupling to see how things lined up. Recall that I had visual alignment problems at the stuffing box (most notable with the engine in gear), which meant that I likely had 'shaft whip'?? at the extreme prop end, if I have my terms correct. I am running short on time (40 hours to splash), but I have lots of leave at work. I'd much rather tinker at the boat than sit in the office.
__________________
-Shawn "Holiday" - '89 Alura 35 #109 "Twice Around" - '77 C-30, #511 with original A-4 & MMI manifold - SOLD! (no longer a two boat owner!!)
Last edited by sastanley; 05-12-2010 at 11:41 PM.
|
|
#69
IP: 76.24.202.79
05-13-2010, 12:39 AM
|
||||
|
||||
|
Shawn - Your use of the term "shaft whip" is correct. Because of the severity of your misalignment and the longevity and the motor mount problem, most likely a view of the stuffing box will be misleading. The most important consideration is that the shaft run true in the strut bearing. Ignore the stuffing box for now since the shaft log (hose section) is probably distorted. Getting the shaft true in the strut bearing will involve climbing in and out of the boat many times until your temporary "cradle" inside the boat holds the shaft exactly where you want it - no need to spin it. Of course we are now assuming that the shaft is indeed straight. This is the part that must be done on the hard, since once you are in the water you cannot check the strut bearing. At this point the shaft and shaft coupling should be right where you want them. Now begin to move the "dog" toward the "tail" without changing the position of the shaft coupling. No need to do any spinning until the engine is where you want it. In order to move the engine on all four of its feet it is important that all 4 motor mount studs have clean lightly oiled threads so you can make fine adjustments. Also the lags holding the feet to the sleepers will have to be loosened so you can adjust athwartship. Maybe you could post a picture of your motor mount.
|
|
#70
IP: 76.7.102.57
05-13-2010, 07:33 AM
|
||||
|
||||
|
Great info. Sounds like you could loosen the lags on all mounts except for the starb/aft and nudge the fly wheel end to port. That may get you to 2 and 10 so side to side are even. If the port aft nut is all the way down and the port forward nut is all the way up could you shim under the port forward mount to gain some thread/adjustability? Then adjust both forward nuts up to close the top to bottom gap. All this is based on the shaft being right as it sits now. Dan S/V Marian Claire
|
|
#71
IP: 24.152.131.220
05-13-2010, 08:12 AM
|
||||
|
||||
|
Shawn,
After you launch and realign please post back regarding any changes. Depending on how they're supported or blocked in the yard, it's my experience that lighter fiberglass hulls like ours can take on a dramatically different set in the water. At Capital Yachts there were several times we had to adjust the head door after a Newport 30 was launched. The door fit well in the shop but wouldn't close in the water. Our wood cradles weren't adjustable and I suspect we had a few that supported the hulls a little differently than others.
__________________
Neil 1977 Catalina 30 San Pedro, California prior boats 1987 Westsail 32, 1970 Catalina 22 Had my hands in a few others
|
|
#72
IP: 206.125.176.3
05-13-2010, 08:29 AM
|
||||
|
||||
|
Thanks all, will do. I understand the engine/shaft arrangement may be different when floating, & will look at it again after splashdown. The boat is supposed to sit at the marina thru Saturday (mast stepping) so once she's floating, I may have some time to tinker again.
I only plan to spend a few hours at work today, so I'll be back at the boat by lunchtime I hope & can snap some more pics. To really beat on the port mounts (athwartship movement), I'd probably have to remove the waterlift muffler & batteries, cables, intake hose, etc., unless I can come up with some clever way to make a lever arm. At least all of the up/down adjustments are free and moving well. I am guessing like everything else in the boat, the mount feet were never moved, so the mounts are 'welded' to the boat. I can get all the lags loose, but no movement. Neil, funny you mention doors..on my stepfather's Tartan 3000, the head door wouldn't close for years..back when we were racing it hard, we started drying the boat out with a dehumidifier..after a few weeks, viola! the door suddenly "fit" in the frame again!
__________________
-Shawn "Holiday" - '89 Alura 35 #109 "Twice Around" - '77 C-30, #511 with original A-4 & MMI manifold - SOLD! (no longer a two boat owner!!)
|
|
#73
IP: 76.7.102.57
05-13-2010, 08:49 AM
|
||||
|
||||
|
I know access on the MC is better than on most boats. Do you have room to use a small hydraulic or scissor jack to move the engine? Nice smooth pressure. Just an idea. Dan S/V Marian Claire
|
|
#74
IP: 206.125.176.3
05-13-2010, 09:31 AM
|
||||
|
||||
|
Dan,
Good idea, but not sure where I'd brace it from the other end...that's kinda the issue..If all those parts were out of the way there is just a rounded empty hull..thanks and keep the ideas flowing!
__________________
-Shawn "Holiday" - '89 Alura 35 #109 "Twice Around" - '77 C-30, #511 with original A-4 & MMI manifold - SOLD! (no longer a two boat owner!!)
|
|
#75
IP: 206.230.48.34
05-13-2010, 10:15 AM
|
|||
|
|||
|
With all this talk of 0.003" tolerance between the two couplings, it is not clear to me how you can tell where the "natural" or "ideal" position of the shaft coupling is to within anywhere near 0.003". With our without a jig, or suspending the shaft from a string, etc.
Why so much (false) precision? Could it be that the 0.003" is the maximum tolerance you can have between the two couplings ONCE everything is bolted down?
|
 |
| Thread Tools | |
| Display Modes | |
|
|
 Similar Threads
|
||||
| Thread | Thread Starter | Forum | Replies | Last Post |
| Indigo thermostatic control valve cooling system users | ArtJ | Cooling System | 1 | 05-25-2013 03:39 PM |
| Indigo PVC vs. MMI PVC | charles@pricefarrington.c | General Maintenance | 12 | 08-18-2009 01:16 AM |
| Installed the Indigo PCV kit today | Baltimore Sailor | General Maintenance | 6 | 04-09-2009 01:22 PM |
| Indigo Crankcase Ventilation Kit | Bob.Griffin | Aftermarket Kits and Accessories | 9 | 09-10-2007 09:19 AM |
| wanted: Indigo Propeller | skhorleb | Wanted to Buy - Engines and Engine Parts | 0 | 06-25-2007 09:35 AM |


 Linear Mode

