|
#101
IP: 70.186.109.11
 06-16-2018, 12:01 AM
|
||||
|
||||
|
The batteries are in the front of the right side(facing fwd) quarterberth. The middle of the qb has an access hatch that lets me see the prop shaft stuffing box and fuel tank. The stuffing box is just within arm reach from that hatch. Used that opening to screw down the fuel tank support bracket I built. Also used it to change the trans cable. Due to the angle of the hull, you can put arms in it and peek in with your head, but not enough space to do more than that.
The left side of the engine box is hidden behind cabinetry with only a tiny openable door. Scratch that. The coupling bolts are inside the walls of the engine box. You can barely see the end of the coupling from the qb access holes, but not the coupling bolts. MAYBE a long ratchet extension could unscrew the coupling bolts from the qb access hole if somebody guides the socket onto the bolt in the engine box. Options as I see it are: 1)Pull the motor to have access to the parts. 2)Lay on top the engine and by feel try to remove the coupling bolts. 3)Remove the fuel tank. Remove the tank support. Cut the rear wall of the engine box enough to see what you're doing. Requires small person in confined space entering thru port locker. Do this while the outside temp is 90 to 95 degrees. I've done a lot to this boat so far, but while this isn't very technical, its a major p-i-t-a.
__________________
Bill L. 1972 Ericson 27 Hull #61 Atomic 4 
|
|
#102
IP: 72.218.163.249
06-16-2018, 08:20 AM
|
||||
|
||||
|
Geeze, Bill, I know exactly what you're talking about. I concur: its a major p-i-t-a.
And I'm thinking changing the exhaust pipe is gonna be hard. I vote option 1. That or like I'm semi jokingly thinking- cut a hole in the hull, like the big guys do. Best wishes on the project- and I know you just want to go sailing.
__________________
Bill McLean '76 Ericson 27 :valhalla: Norfolk, VA
|
|
#103
IP: 24.152.132.140
06-16-2018, 02:49 PM
|
||||
|
||||
|
As you plan on how to get the engine out (shaft coupling, exhaust) include a strategy to get it back in - and aligned. Alignment is all about the shaft coupler.
If it were me I'd be thinking about removing structure around the engine and replacing with removable panels.
__________________
Neil 1977 Catalina 30 San Pedro, California prior boats 1987 Westsail 32, 1970 Catalina 22 Had my hands in a few others
|
| The Following 2 Users Say Thank You to ndutton For This Useful Post: | ||
Administrator (06-16-2018), alcodiesel (06-16-2018) | ||
|
#104
IP: 131.162.198.114
06-17-2018, 08:50 AM
|
||||
|
||||
|
Plenty of good thoughts on this thread.
Regardless of whether you try to do this with the engine in situ or pulled, you are going to have to loosen the shaft coupling bolts with the engine in place. And, as Neil wisely noted, you are going to have to align the engine (probably a good idea to do this whether you all the engine or not) and tighten the shaft coupling bolts with the engine in place. All of which suggests you need better access to that coupling area than you have now. On my E29, the coupling resides just ahead of the aft bulkhead of the engine compartment. There is an access panel - factory installed I believe - just aft of that to allow access to battery box, stuffing box, thru hulls and the shaft coupling. Without that access panel, it would be impossible to work on these items. Suggestion - since you are going to need access to this area whichever route you choose, start by making an access panel and see what you can accomplish with the engine in place. Hope that helps, Peter
|
|
#105
IP: 174.235.143.248
06-17-2018, 10:48 AM
|
||||
|
||||
|
Went down to the boat about 10pm. If working during the daytime was too hot, then lets try the night.
Setup small a/c in the door frame, sealed it off. Put drop light around back side of motor. This left me see the coupling and bolts. Put cushion over top of engine. All access was over the top of the engine. Used oscillating tool to remove parts of the back wall. Was just thin fiberglass. This gave me enough room to put tools in that area. Removed 1st coupling bolt by pushing fwd on one bolt and bwd on another bolt so shaft would not spin. Bolt had oil on it, not rusty. Was very tight but came loose. Put the trans in gear to assist keeping coupling still. Cut a bit more of the back wall as the edges were hurting my hands. Removed 2nd coupling bolt by pushing fwd on one bolt and bwd on another bolt so shaft would not spin. Bolt had oil on it, not rusty. Was very tight but came loose. On the last bolt, had to figure how to keep the motor from spinning. Even in gear it would still turn. Found the manual engine crank handle. Inserted it and used that to stop the crank from turning. With that holding things still, was able to break free the 3rd coupling bolt. To separate the coupling halves, I took a hammer and tapped gently. Rotate the engine. Repeat. Rotate. Tap. At some point the coupling halves popped free. The last problem was not enough room to pull the rear coupling off the shaft. Stewed on that for a while but went with the only option. Removed all 8 engine mount to floor bolts. Not rusty. Removed the water outlet hose. Just a clamp. Removed the muffler bolts. Not frozen and not rusty. I was amazed about this but the bolts looked 'newish' instead of ancient. Pulled fwd on the engine enough to move it about an inch. That was just enough clearance to pull the coupling off the shaft, and it came free. Looked back into the work space and found the shaft pinch bolt. Also found the shaft key. With all the parts in my hand, it became apparent what had happened. 1)The shaft pinch bolt backed out the hole. The hole in the shaft pinch bolt where you wire it up was clogged and dirty. There had been no wire to keep the pinch bolt in place. 2)The brass shaft key was only about 3/4 of an inch long and intact. The keyway on the coupling is about 1.5" long. That key was way too short. 3)The prop shaft keyway was all the way back against the water seal. This means the shaft itself had move rearward at some point. When it did move backwards(not having a pinch bolt), since the shaft key was so short, it disengaged from the coupling. This is why the coupling would spin but the shaft didn't. The shaft had backed out the coupling due to a missing pinch bolt and with the short key, was no longer engaged in the coupling. All parts are undamaged. So now: Have to find a longer brass key. I figure 1.5" should work. Material is square brass rod 1/4"(3/16"?) wide on a steel 3/4" prop shaft. Know where to find some? Have to install and wire the shaft pinch bolt OR replace the coupling with the moyer coupling. Put it all back together. Went to bed about 2am. When I got up, I installed the pertronix kit and the moyer coil. Obviously did not start the engine with it disconnected like it was.
__________________
Bill L. 1972 Ericson 27 Hull #61 Atomic 4 Last edited by CajunSpike; 06-17-2018 at 09:49 PM.
|
|
#106
IP: 70.161.175.132
06-17-2018, 05:43 PM
|
|||
|
|||
|
Key Stock
McMaster Carr had some nice 18-8 stainless that is slightly under size.
92530A136, 18-8 Stainless Steel Machine Key Stock, Undersized, 1/4" x 1/4", 12" Long If a customer wants one with a prop, this is what I use. They also have full size brass. Tom
|
|
#107
IP: 24.152.132.140
06-17-2018, 06:05 PM
|
||||
|
||||
|
Two recommendations:
__________________
Neil 1977 Catalina 30 San Pedro, California prior boats 1987 Westsail 32, 1970 Catalina 22 Had my hands in a few others
|
| The Following 2 Users Say Thank You to ndutton For This Useful Post: | ||
Administrator (06-17-2018), CajunSpike (06-17-2018) | ||
|
#108
IP: 174.235.134.153
06-17-2018, 07:14 PM
|
||||
|
||||
|
Moyer staff.... will your split coupling mate up with the 3 bolt engine coupling half as is?
To explain better, if I keep the original coupling half bolted to the motor, will the back half you sell, correctly attach to it. Diameter of current coupling is 3/4". Key appears to be 3/16th. Original rear coupling has 3 holes for bolts to pass thru, not threaded. Front 1/2 has 3 threaded holes. Bolts have 9/16" heads.
__________________
Bill L. 1972 Ericson 27 Hull #61 Atomic 4 Last edited by CajunSpike; 06-17-2018 at 09:38 PM.
|
|
#109
IP: 138.207.175.58
06-17-2018, 07:17 PM
|
||||
|
||||
|
Forwarded to Don.
Bill
|
| The Following User Says Thank You to Administrator For This Useful Post: | ||
CajunSpike (06-17-2018) | ||
|
#110
IP: 70.186.109.11
06-17-2018, 07:53 PM
|
||||
|
||||
|
Since ya'll have been patient enough to read this and help, time for the photos.
Slid the drop light in the engine box. First good view of the subject. Back wall intact. Ventilation fan was removed.  Wide angle shot of engine box. Back wall intact. Batteries are under door to left.  Straight down view of coupling. Back wall cut.  Side view after coupling removed and engine moved. Back wall cut. Muffler system and water line removed.  Straight down view after coupling removed and engine moved. Back wall cut. Notice how close the shaft keyway is to the water seal. This proves the shaft is further back than usual. Hate to think what would have happened if the shaft backed itself all the way out.  The source of this discussion. The key is yellow. Its WAY too short for what I think it should be. I called it brass. What you you think? Key size is either 3/16"(probably this) or 1/4" Prop shaft is stainless steel as far as I can tell. Isn't the key supposed to be softer material than the shaft so it can shear on impact? If both are steel, there is no shearing ability right? The hole in the pin bolt was clogged with trash. This proves there was no safety cable installed. Its been opened in this pic. 
__________________
Bill L. 1972 Ericson 27 Hull #61 Atomic 4 Last edited by CajunSpike; 06-17-2018 at 09:51 PM.
|
|
#111
IP: 70.186.109.11
06-18-2018, 10:21 PM
|
||||
|
||||
|
Just placed order with MMI.
New solid coupling 3/4". New impeller. New water pump gasket. New exhaust pipe gasket and bolts. Should be able to put this back together, no problem.
__________________
Bill L. 1972 Ericson 27 Hull #61 Atomic 4
|
|
#112
IP: 184.176.196.206
06-19-2018, 10:14 AM
|
||||
|
||||
|
Ran into a problem.
The original coupling is 3/4" opening for the shaft. Repeatedly measured, of this I'm sure. The key that it uses is 1/4" square rod. I know this because I bought a 3/16" key and it was too small. Swapped the 3/16" for a 1/4" and the 1/4" key fits perfect. The coupling I bought from Moyer that is 3/4" only comes with a 3/16" keyway. Called them and cancelled the order this morning. Anybody knows where I can find an A4 coupling for 3/4" shaft using a 1/4" keyway? Old part is reusable if necessary but I'd rather replace it.
__________________
Bill L. 1972 Ericson 27 Hull #61 Atomic 4
|
|
#113
IP: 24.152.132.140
06-19-2018, 10:25 AM
|
||||
|
||||
|
Either find a local machine shop capable of broaching or clean up the old coupler.
__________________
Neil 1977 Catalina 30 San Pedro, California prior boats 1987 Westsail 32, 1970 Catalina 22 Had my hands in a few others
|
|
#114
IP: 32.211.28.40
06-19-2018, 10:29 AM
|
||||
|
||||
|
The 'key' is that the key fit the shaft well. If the shaft has a 1/4" keyway, then you want to use a 1/4" key. It should be a press fit into the shaft. The part of the key that fits into the coupling can be cut down to 3/16". The key can be a bit loose in the coupling with no issues.
|
|
#115
IP: 184.176.196.206
06-19-2018, 10:37 AM
|
||||
|
||||
|
So you're suggesting using a 'dual size key'? Like half of it being 3/16 and the other half being 1/4?
Don't know if it exists like that short of a machine shop making one.
__________________
Bill L. 1972 Ericson 27 Hull #61 Atomic 4
|
|
#116
IP: 108.45.44.91
06-19-2018, 10:45 AM
|
||||
|
||||
|
Found these, but neither specify the keyway width. Guess you'll have to call them. Both appear to be a Buck Algonqun part, specifically for the Atomic 4.
https://propshopinc.com/3-1-2-solid-...mc350-p14.html https://www.generalpropeller.com/sol...1=Transmission
__________________
@(^.^)@ Ed 1977 Pearson P-323 "Dolce Vita" with rebuilt Atomic-4 
|
| The Following User Says Thank You to edwardc For This Useful Post: | ||
CajunSpike (06-19-2018) | ||
|
06-19-2018, 10:53 AM
|
| CajunSpike |
|
This message has been deleted by CajunSpike.
|
|
#117
IP: 184.176.196.206
06-19-2018, 11:03 AM
|
||||
|
||||
|
Ok, I'm an idiot.
Was about to post a photo showing the size of the hole in the coupling, that it was 3/4". The only problem is that I'm using a printed ruler and I didn't start at zero. Started at the edge of the paper. Starting at zero, the coupling hole is 7/8". The Moyer part for a 7/8" shaft DOES include a 1/4" keyway. I'll go back to my closet now. After the fact note for future reference: My shaft IS a 3/4" shaft. It also has a 1/4" keyway. Was unable to find a new coupling with these parameters. Ordered a 7/8th coupling with 1/4" keyway thinking that was the right size. Did not use it since shaft did not fit right, went back with original part. :-(
__________________
Bill L. 1972 Ericson 27 Hull #61 Atomic 4 Last edited by CajunSpike; 07-01-2018 at 05:37 PM.
|
|
#118
IP: 166.137.252.115
06-19-2018, 11:06 AM
|
|||
|
|||
|
FWIW I think the split coupling is a huge and worthy upgrade. Getting a sound shaft out of a sound solid coupling in tight quarters is a terrible horrible no good very bad job.
|
| The Following 2 Users Say Thank You to tenders For This Useful Post: | ||
Administrator (06-19-2018), CajunSpike (06-19-2018) | ||
|
#119
IP: 70.186.109.11
07-01-2018, 05:15 PM
|
||||
|
||||
|
Spent several hours in the boat last night, a/c unit in the door.
Prop shaft had backed out 4 inches on its own. Got coupling reinstalled. Shaft key reinstalled. Pinch bolt sitting in shaft detent. Pinch bolt tightened hard and wired in place with heavy copper wire. Shoved the motor back into place, got a few mount bolts into the floor. Had tried installing 3 new coupling bolts but they were too long. They went thru the coupling and pressed against the trans housing. Removed those and went back with original non rusty coupling bolts. Removed water pump cover to change the impeller. Had bought 2 paper pump cover gaskets cuz I didn't know which pump I had. Come to find out neither gasket fit because the pump cover was the type held on by thumbscrews and has a thin rubber o-ring type seal. Apparently its an MMI water pump door kit. https://moyermarine.com/product/mmi-...t-csob_10_370/ So now I have 2 untouched paper water pump gaskets but really need the o-ring type seal. Guess which is the old part?  Had to gently beat the old impeller copper center ring off the pump shaft. Shaft in great condition. All 6 'ears' of the impeller were 1/2 way separated from the base. Installed new impeller and closed up the back plate of the pump. Hooked everything up but ran into two issues that I left unfinished. Having problem lining up the exhaust pipe. Got one bolt and new gasket in. Have to twist the fitting slightly to align the 2nd bolt and hole. I think the solution to this is to use a rope to pull up the standpipe slightly thus twisting the exhaust pipe just enough for it to align. Appears to be some weight on the pipe causing it to twist. Also the rear sink side engine mount twisted a bit, so the bolt holes don't align with the holes in the floor. For this, I can lift the engine slightly with a come-along, realign the mount and drop it back into place. So other then the exhaust bolt and floor bolts, everything is back together including the new electronic points and coil.
__________________
Bill L. 1972 Ericson 27 Hull #61 Atomic 4 Last edited by CajunSpike; 07-04-2018 at 09:00 PM.
|
|
#120
IP: 72.218.163.249
07-04-2018, 07:46 AM
|
||||
|
||||
|
I don't know, Bill, but there might be a few more seconds left in that impeller. Actually it looks like you got it out just in time. Now c'mon up to Norfolk and hook up a new exhaust pipe for me.
Thank you for documenting what you are doing.
__________________
Bill McLean '76 Ericson 27 :valhalla: Norfolk, VA
|
| The Following User Says Thank You to alcodiesel For This Useful Post: | ||
CajunSpike (07-04-2018) | ||
|
#121
IP: 70.186.109.11
07-04-2018, 09:09 PM
|
||||
|
||||
|
Never been to that area and it actually sounds like it would be a good time.
:-) I actually was pretty shocked how bad that impeller was, when I saw it. I'm doing this to document the various issues that I come across and solutions, as accurately as possible. I've been helped by so many people, I'm hoping the tales here may help somebody in return. All work in this last discussion is done by laying over the motor on a cushion. Get in there, do something for a few minutes, then get out and rest for a bit. Repeat till done.
__________________
Bill L. 1972 Ericson 27 Hull #61 Atomic 4 Last edited by CajunSpike; 07-04-2018 at 09:19 PM.
|
|
#122
IP: 70.186.109.11
07-07-2018, 10:17 PM
|
||||
|
||||
|
Today's update
Since was rainy and overcast, that made a good day to go work on the boat.
Got the motor mounts all turned straight, where one was crooked. All bolts into the floor thru the mounts and tightened. After an hour of trying to get the 2nd exhaust manifold bolt installed but failing, a slip neighbor came by and offered to help. I held the exhaust stack in position and within 2 minutes he had the 2nd bolt screwed in and tightened. I thanked him profusely cuz it had been driving me crazy not to be able to get that bolt in. Left a water line loose and cranked the engine over. Saw water dripping from the line. This was to prove the new impeller was working. Tightened line. Tried to crank engine. Was doing that skipping style noise like it did when I first got it. Sorta wanting to start but sorta not. Pulled a plug, no spark. Pulled the cap off the distributor to find the rotor was not locked into position. Apparently when I installed the magnetic ring for the pertronix, I didn't put it low enough on the center post. Took a deep socket and tap tap tap, till it was bottomed out. Reinstalled the rotor(which locked in now) and cap. Hit the key. It fired instantly. Ran rough but I knew that was because I had turned the timing when installing the pertronix kit. Did a little left/right distributor adjustment till I found a relatively smooth idle. Put it in fwd gear and got a knock knock noise and knew what it was immediately. I had bought 3 new coupling bolts that were too long. Left one in place with extra washers but it looks like when you go to fwd gear, the extra length is just enough to scrape on the trans housing. That's the knock knock as the shaft rotates. Went to neutral and didn't try again. That bolt has to come out and the original bolt put back in. So in this adventure I've gone from knowing not much about the prop coupling to having it back together and working with only minor issues. May actually get to take it out for the 2nd time some day!
__________________
Bill L. 1972 Ericson 27 Hull #61 Atomic 4 Last edited by CajunSpike; 07-07-2018 at 10:19 PM.
|
| The Following User Says Thank You to CajunSpike For This Useful Post: | ||
tenders (07-08-2018) | ||
|
#123
IP: 70.186.109.11
07-14-2018, 11:08 PM
|
||||
|
||||
|
Last night
Spent the night on the boat.
Removed that too long coupling bolt. The scrape marks on the end of the bolt confirmed my theory of what the vibration in fwd gear was. The bolt was just barely scraping on the back of the trans. Found the original bolt, installed it tightly with fresh lock washer. Reinstalled the engine box ventilation fan. Loosened the distributor timing lock bolt. When morning came around, I hit the starter. As usual it took a little choke and it spun to life. Did some timing adjustment and settled on a spot where it sounded the best. Dropped it into fwd gear. Boat moved fwd and there was NO obnoxious sound from the engine/tranny. Just sat there and spun the prop shaft peacefully. Engine did not sputter or stall when put into gear. Reverse behaved the same. The Pertronix kit seems to be working right. Bought the kit for $70 and the coil separately for about $50. Later found the same coil for $12, model UC12. Went thru the cabin and picked up all the tools and trash. Cleared off the cabin table and put up all the stuff that was laying around. I've been thru all the major engine systems but been lucky to only find trivial(for the most part) things to fix. The A4 itself works when it has what it needs. Trying to decide if its worth the effort to repair/replace the fresh water tank. The tank water drain line is completely broken open. Also there are a few electrical things that don't light up when they should. That's going to be just checking power feeds I think. Thanks for all ya'll help, comments, and input.
__________________
Bill L. 1972 Ericson 27 Hull #61 Atomic 4 Last edited by CajunSpike; 07-14-2018 at 11:11 PM.
|
|
#124
IP: 71.178.88.32
07-14-2018, 11:56 PM
|
||||
|
||||
|
great update bill. We can continue on with the non-engine parts discussion. I am not 100% up to speed on those issues, however. I don't have a tank drain line for my freshwater system...are you referring to the feed that supplies the faucets? ?

__________________
-Shawn "Holiday" - '89 Alura 35 #109 "Twice Around" - '77 C-30, #511 with original A-4 & MMI manifold - SOLD! (no longer a two boat owner!!) 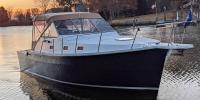
|
|
#125
IP: 70.186.109.11
07-15-2018, 12:12 AM
|
||||
|
||||
|
Yes to your question.
On this boat there is a plastic 14 gallon fresh water tank under the v-berth. I found there is a garden type hose attached to the tank inlet. Don't know where the other end of that fill hose is yet. The tank outlet is supposed to connect to a pump then to the sink, presumably. The plastic tube from the tank outlet to the pump inlet(?) is totally fractured and cracked open. Put any water in the tank and it'll go straight to the bilge.  You can also see two thru hulls connected to each other. Probably the remains of some removed function. If I do replace that tank outlet tube, I still need a way to sanitize the tank assuming its intact. Also need to see how that pump is powered. I can see a push button on the cabinet near the sink but not sure its the pump power switch. Just have to trace the wires. As for the electrical devices, there are 3 instruments viewable from the cockpit. None of them have ever powered up since I've had the boat. Its entirely possible they are just so old, they are dead.  There also is a depth meter in the cabin attached to what appears to be some type of alarm speaker. Also have not gotten that powered up. There is a working VHF radio and a non working AM/FM radio. Looks like the boat was rewired in its life. The main circuit panel has modern type switches and hand made wiring behind it. One of the main panel circuit switches/circuit breaker is tripped. But when you try to reset it, it doesn't stay set. Not sure if its faulty switch or problem in whatever circuit its connected to. Most of the exterior hull lights work. The mast light and the red bow light do not work. The interior 120v plugs I've used, also work. There are 12v plugs too, but not checked yet. Don't feel that any of these issues are Ericson specific. Its just that with all the experience out there, SOMEBODY has already faced and fixed these problems.
__________________
Bill L. 1972 Ericson 27 Hull #61 Atomic 4 Last edited by CajunSpike; 07-15-2018 at 12:41 AM.
|
 |
| Thread Tools | |
| Display Modes | |
|
|
 Similar Threads
|
||||
| Thread | Thread Starter | Forum | Replies | Last Post |
| What tools do I need/How should I prep for cleaning / fixing the carb this weekend | LemonShark2 | Fuel System | 51 | 04-16-2016 10:39 PM |
| Exhaust (hot) leaks @ manifold nipple- 1972 A4 | mtnsailor | Exhaust System | 4 | 09-20-2013 10:13 PM |
| starting after fixing | tom hansen | Troubleshooting | 12 | 01-07-2013 08:32 PM |
| 1972 Atomic 4 | bigd14 | For Sale - Engines and Engine Parts | 0 | 10-20-2009 12:31 AM |
| 1972 Columbia 30' with A-4 | EugD | Drive Train / Propellers | 1 | 05-19-2005 09:27 PM |


 Linear Mode

